This firing took place on Thanksgiving Day last year at my brother’s place out in the country. This is a good firing to analyze because it’s reasonably well documented, and because it resulted in some very successful pots — and some very unsuccessful ones, too. (Yes, you often learn more from your failures than from your successes!)
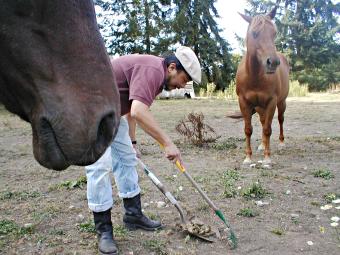
I had heard about the use of dung (mostly cow dung) in pit firing, and wanted to try it myself. So I came to my brother’s place last July and collected some dung from his horses, Midge and Skyboy. As you can see in the photo below (figure 1) Midge was rather suspicious about why I was so interested in her, er, stuff.
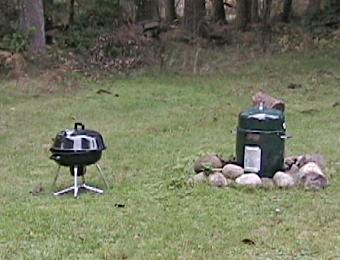
While I could have dug a real pit and fired in there, I decided to bring along a small BBQ grill and a medium size BBQ smoker, and to do my firing in them instead; my rationale is as follows: if the firing is not too smoky, I can probably do the same thing in the city, too. The problem of living in an urban area for the pit fire potter is dealing with fire regulations and nosy neighbors. For the former, it generally means trying not to produce too much smoke, and to be compliant (and to be environmentally responsible) many of us favor a fast firing cycle with minimal amout of smoke; for the latter, well, I thought if my neighbors believed that I was just cooking some hot dogs or smoking a salmon, hopefully they would just leave me alone. Hence the innocent looking BBQs (figure 2) instead of the more customary oil drums or metal garbage cans commonly used by other potters.
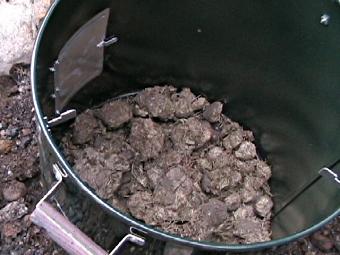
I arrived shortly after noon, and after a bit of socializing with my brother and his family I set out to work. First order of business is to put down a layer of horse dung at the bottom. In previous firings we had used sawdust for this layer, usually about 2 to 5 inches thick. But this is my (first) solo firing, and I got to choose what to use, so I chose horse dung, naturally! Notice that the dung here is in clumps (figure 3), which provides better air circulation than more tightly packed sawdust or store-bought steer manure during the firing.
The pots I brought with me (a total of seven) had all been bisqued to either cone 06 or 04. Unfortunately I don’t have documentation on which is which. From the looks (i.e. the amount of sheen retained from the terra sigillata application) of them, though, I’d presume five out of the seven were cone 06; the other two (the ones having lost the sheen) either had very poor or thin terra sig application, or were bisqued to 04 — or perhaps both. Anyway, I usually apply terra sigillata (or ‘terra sig’ for short, the ‘g’ usually pronounced like ‘j’ as in ‘joe’) and have the pots bisqued to cone 06 for pit firing; but sometimes in a school or with a communal kiln you have to go with what other people want for their pots, especially if they are not pit firing — that’s how I ended up with some 04 pots. When I get my own electric kiln I’ll probably try a lower bisque temperature, e.g. 010 or maybe even lower. Supposedly one gets better colors from the smoke and fumes with a softer bisque. (See my resources section for links and books if you want to know more of the nitty-gritty technical details.)
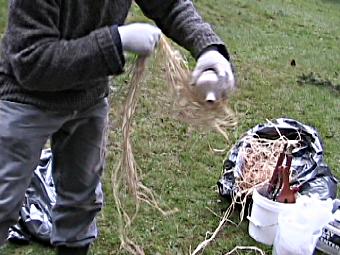
Pit fired pottery are normally unglazed, because the firing temperature is usually too low for even low fired glazes to reach maturity. Instead, the pots obtain a range of blacks and grays via smoke caused by the burning of fuel (wood, sawdust, dung) in a reduction atmosphere; they also acquire other colors (red, pink, orange, green, etc.) via flashes produced by the fumes of various salts, chemicals, vegetation, and other packing materials placed near or directly on the pots. One of my favorite packing materials is salted raffia (figure 4) which I have learned to make and use from a saggar firing workshop with Maria Spies. This is essentially an artificial seaweed — you make a bucket of artificial sea water (I use 4 lbs of canning salt to 2.5 gallons of water), soak the raffia (which you can buy from craft supply stores) in it for 2 – 3 days, then take the raffia out to dry in the sun. (And if you live in the rainy Pacific Northwest like I do, this means you can only do this during the dry summer months.)
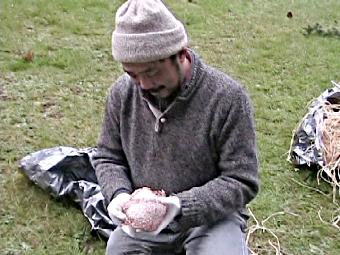
Another favorite packing material is a copper net (figure 5) made from a disemboweled “Chore Boy” type copper scrubber. I love to use it because I had great results with it in my very first pit firing. Unfortunately I have not been able to duplicate that effect ever since. Another one which I did not use in this firing is banana peels. Among my pit firing buddies, there are believers as well as non-believers when it comes to banana peels. I’ll claim to be neither, but will simply observe that, for every pot that I have put banana peels on, there has always been some deep red flashes on the pot somewhere, though not exactly where the banana peels had been. Coincidence or is there a causal relationship? I’ll let you be the judge, after you have done your own experimentation with banana peels. :-) (And drop me a note about your results, if you do get around to experiment with this.) Incidentally, if you should ever want to know more about what other packing materials to try and other ways to decorate your pots, the excellent book by Cheryl Herr-Rains is an indispensible resource.
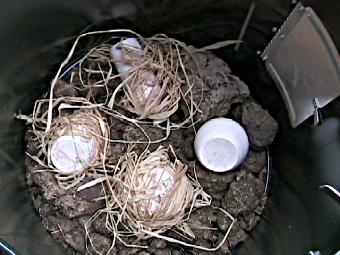
After packing the pots were placed inside the smoker. Notice how they are placed (figure 6) — three of the four bottles are planted upside down at an angle, while the fourth was lying on its side. All were firmly nestled between clumps of horse dung. This turns out to be quite intentional, as it is one of the very few areas about pit firing that we actually have some reasonable control over the outcome. If everything goes well, the area of the pot in direct contact with the dung underneath should turn black, or at least a deep gray. With very fine sawdust, we usually get a rich, deep, solid black; while coarse sawdust and wood shavings tend to yield a lighter grayish shade. I was curious to find out what horse dung (in this clumpy form) would do, though I was fairly confident that it would behave more or less like sawdust or wood shavings would. Also, to get a better sense of what effects horse dung would have by itself, I kept one pot completely bare and packed dung all around it instead.
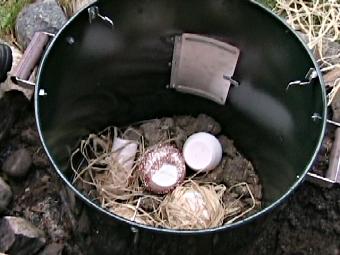
With the addition of the pot wrapped in the “Chore Boy” copper net, there are now five pots in the BBQ smoker (figure 7). Take a note of the position of each individual pot in the pit, because, as you’ll see later, the pit seems to have developed hot and cold spots during the firing, which may have contributed to different pots having very different outcomes even though they were fired in the same pit. (Hint: the two left-most pots in figure 7 would later be in the cool side of the pit, i.e. where you see no flames in figure 14. They are also the two pots with almost no markings from the fire in figure 19 (front and right). Coincidence again? Maybe. But maybe not. More on this later.
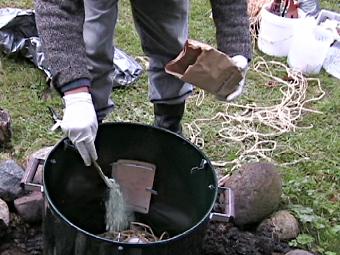
The next step is to sprinkle some 3 to 4 tablespoons worth of copper carbonate (‘copper carb’ for short) around the pots (figure 8). Copper carbonate is another one of the few relatively predictable ingredients for a successful pit firing. We usually use a lot of it, basically covering anywhere from 1/2 to the whole surface area of the bed of sawdust with this green stuff. Copper carb often produces lots of interesting color flashes, especially different shades of red. But for this firing I had actually thought of not using it at all. I had been trying to get red flashes without the use of copper carb — so far unsuccessfully; and thought I’d try again here. Also, in the spirit of scientific experimentation (I came here to find out how horse dung works in a pit fire, didn’t I?) I thought I should limit the number of variables, so I’d be more certain of the causal relationship between horse dung and the firing results. But I changed my mind the last minute. After all, I had some very nicely made pots in this pit — very light weight, thin, and quite elegant looking. And I don’t always throw this well on the wheel; who knows when I’d manage to make pots this nice again. So I was reluctant to sacrifice a couple nice pots for a real scientific experiment — well, science would just have to wait, and it would have to work with some inferior pots instead of these nice ones!
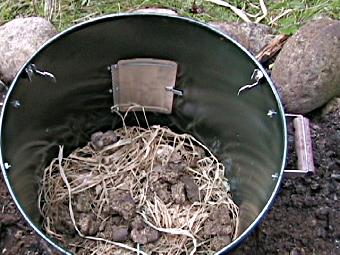
After the sprinkling of copper carbonate, I covered the pots completely with horse dung and more salted raffia (figure 9). Here I deviated from the standard firing method of my pit fire group — we generally do not pack sawdust around and most definitely not on top of the pots, as we have found that doing so tends to make the firing exceedingly smoky, or worst, have the fire die before reaching the pots. But since this clumpy form of horse dung looked pretty breathable, I figured I could take a chance here.
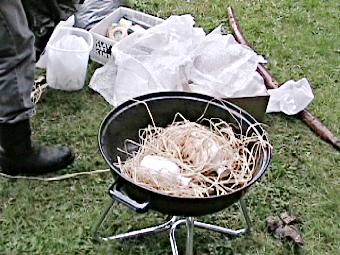
With five of the seven pots all set to go, I now put the remaining two pots inside the small BBQ grill. Since these two pots were less than perfect — both have terra sig that was flaking off — I decided to do my scientific experiment here: not a trace of copper carbonate was put into this grill. One layer of horse dung, then the pots, then some salted raffia loosely placed around the pots (figure 10) — that’s all. I vaguely remembered from a previous saggar firing that some of my pots had gotten orange blushes from salted raffia or other salted grasses, without any copper carb around; I thought I might be able to get similar results here.
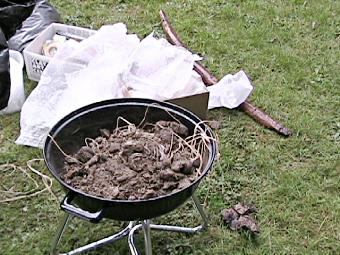
The pots were then covered with a layer of horse dung on top (figure 11), just as the pots in the smoker were. The shallowness of this grill caused both the bottom and top layers of dung to be rather thin, and this made me somewhat uneasy. I wanted to nestle the pots snugly in the dung, but found it impossible to do so. Kind of like trying to plant something in only 2 inches of soil. In any case I had run out of horse dung so the point was moot (well, there were wet ones out on the pasture, but they wouldn’t burn so good.) By the way, for those of you who are curious — the dry horse dung is completely odorless! I mean, you can place a clump (a completely dry one, that is) right at the tip of your nose, and you won’t smell a thing. The burning of it does produce a distinctive smell, but it’s not at all an unpleasant one. I thought it smelled like someone smoking meat or fish, though others thought it was closer to the smell of that weedy stuff — you know, the stuff that Bill Clinton had somehow forgotten to inhale when he tried it years ago.
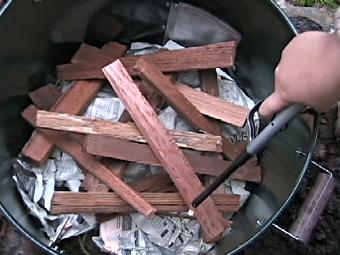
Now that all the pots were ready I added the crumpled newspaper and some seasoned kindling wood, and lit the fire. The amount of wood used for this BBQ smoker is pretty much what you see here (figure 12), plus about 4 or 5 fireplace sized logs added on later. In other words, not a lot. For the small grill, it was even less — pretty much what you see in the picture below (figure 13), and that’s about it.
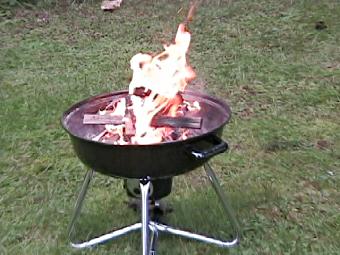
The fire was lit around 1:30 pm, and both the smoker and the small grill had a vigorous fire going within 20 minutes.
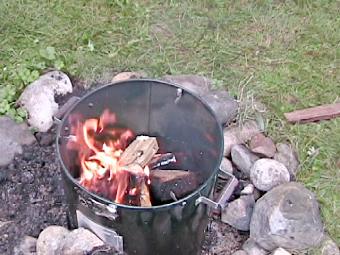
The relatively narrowness of the BBQ smoker in comparison to the size of the logs resulted in an uneven distribution of the logs inside the smoker. In the picture above (figure 14), it can clearly be seen that the fire was concentrated on the left side of the smoker. In hindsight, I probably should have tried to spread the coals around and to make sure the fire was distributed more evenly as I continued to feed it — but of course hindsight is 20/20. After it had been burning vigorously for an hour and a half, I stopped feeding the fire of the smoker at about 3:20 pm.
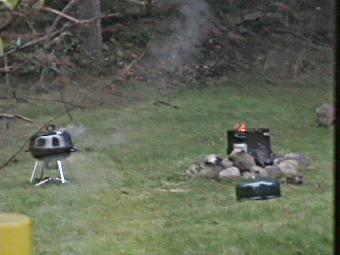
Meanwhile, the fire at the small grill had already been reduced to embers. (The shallowness of the grill allows no room for additional fuel.) As the two pots in it became partially exposed, I noticed that neither had any fire marks on them. Panicking, I closed the lid tight at around 3:30 pm, leaving just a tiny crack on top, and hoped that by starving the fire from gettting more oxygen I would create some smoke to darken the pots somehow. The BBQ smoker remained uncovered, however, with flames still visible (figure 15) for another 20 minutes or so. But then it started to rain hard, so I placed the lid on the smoker too, except here the lid was placed very loosely, leaving plenty of openings for air circulation.
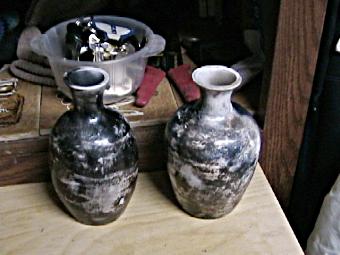
By 6:30 pm the pots in the small grill were cool enough to handle, so I started to take them out and brought them inside the house for cleaning and to get a better look. Well, the closing of the grill’s lid turned out to be a very good call indeed, as the two previously unmarked pots both received a good smoking with an interesting range of blacks and grays (figure 16). However, there wasn’t any of the orange or peach color flashes I was hoping to get from the raffia. But then, considering how bare the pots were before the grill lid was closed, I ought to just count my blessings and stop complaining already!
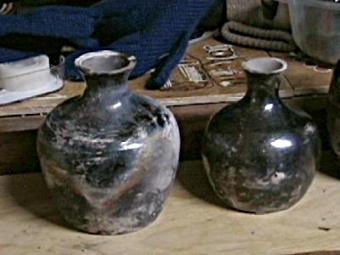
The pots in the smoker, however, were still too hot to touch. But I was getting impatient, so I put on my leather gloves and started to pull out the coolest piece around 7:30 pm. By 8:40 pm — about 7 hours after lighting the fire — all the other pieces from the smoker had been removed as well. And here are the results: the bare pot with no packing material (figure 17, right) turned out pretty much as I had expected — black all around, more or less. The pot with the “Chore Boy” net (figure 17, left), however, did not quite meet my expectation. But there was something interesting with this pot nonetheless. Do you see the faint reddish tint that runs diagonally up towards the upper right shoulder of the pot? Well, as the pot was cooling on the kitchen counter, shortly after this photo was taken, the red tint disappeared. And then, just as unexpectedly, some half an hour later my sister-in-law noticed a yellow-green hue glowing where the red tint used to be. Today the pot still has that yellow-green tint, but you’ll have to put the pot in daylight or under a fluorescent light to see it. Under incandescent light it only shows different shades of gray.
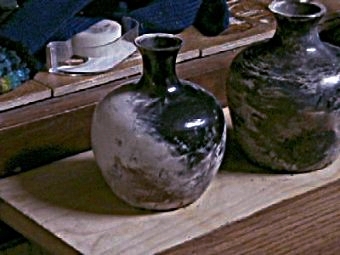
The best piece (figure 18, left) from this firing turns out to be a pot that was tightly wrapped in a big bundle of salted raffia. It also happens to have been located in what appears to be the hottest part of the smoker, judging from a close look at the photos of the pot’s placement and of the fire (figure 7, 14). I’ll write more about this particular pot, with photos taken from different sides, in an upcoming post. So come back and read all I have to say about how — I think — different marks and flashes got onto the pot. :-)
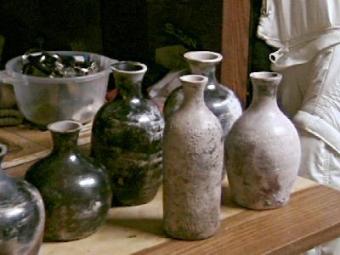
Finally, sometime you win and sometime lose, and sometime you both win and lose in the same firing. See those two pinkish beige pots in the photo above (figure 19, front and right)? They hardly got any marks on them, even though they were in the same pit (the smoker) with these other well blackened pots. And if you look at the pictures (figure 6, 7, and 9) of how they were packed and planted in the pit, you’ll see that their treatment is not all that different from that of the other pots. So what’s going on here? Why are they getting no colors? Okay, I did write about hot and cold spots during the firing, and I also wrote about the different bisque temperatures earlier in this post. But how do we know which, if indeed either of them, is the real culprit? Ah, this calls for more experimentation which I did carry out and will write about in a future post. (Yes, my friends, there is a scientific component to the art and craft of pottery!) So stay tuned…