A couple weeks ago I was invited to lead a pit firing at Lin Holley‘s place on Vashon Island near Seattle. It was the first time I was put in charge of a pit fire with a group of experienced potters who nevertheless were pit fire newbies, and I worried beforehand that the firing would not turn out well enough, the pots would not pick up colors, and the participants would be so disappointed that they would never pit fire again. So I studied my notes and videos from previous firings carefully, and came up with a relatively conservative firing strategy that I hoped would maximize the chances for getting strong colors onto the pots. Luckily for me and for the others as well, the strategy worked, and everybody seemed very happy with the results (figure 1).
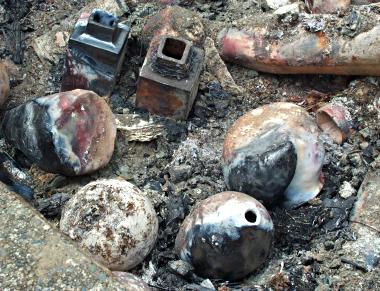
N.B. if you have done pit firing, or if you have read my post on a previous firing, you’d know that the colorful pots in figure 1 above had already been handled before the picture was taken. The telltale sign is the jet black area on each pot — these should be on the side that’s still buried in the embers and thus invisible to us at this point.
All in all, I was very happy with this firing, and I thought it had served its main purpose well, i.e. as an introductory firing for first timers. It was done quickly, less than 6 hours from lighting the fire to taking the last pot out; it generated very little smoke; it resulted in just one broken pot and one slightly damaged one out of a total of 20 or so; and it got strong, dramatic colors on most pots. Below I’ll document the timeline and the process of this firing, so I’d know how to repeat it the next time, and hopefully you can use this as a reference for your own firing as well.
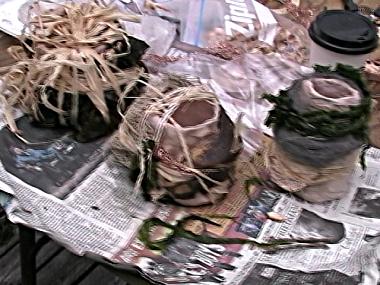
We arrived at Lin’s place around 9:30 in the morning. I had brought along my usual packing materials to be shared by all: salted raffia, salted burlap, “Chore Boy” type copper netting, steel wool strands, and banana skins. Since we were just a short 10 minutes walk from the beach, we also had some real seaweed as well (figure 2). Fresh vegetables and oyster shells were also used on some pots.

While the others were still busy packing their pots, I went ahead to prepare the pit, which was wide and shallow — about 3 feet by 3 feet wide, but only 18 inches deep. Here is the layout of the pit bed, starting from the bottom-most layer:
- coarse pine sawdust (rabbit bedding type): ~ 2 inches
- store bought fine, shredded horse manure: ~ 1 inch
- copper carbonate: ~ 1 lb, covering 3/4 of surface area (figure 3)
- dried cat food: about a cup, sprinkled about randomly
The cat food is something new for me, but I have recently met potters who would swear by it, so I figured I’d give it a try. But a minor problem soon presented itself: after I put the cat food in the pit, Lin’s cat started pacing back and forth at the edge of the pit looking for a chance to jump in — and we had to shoo it away multiple times until the fire was lit.
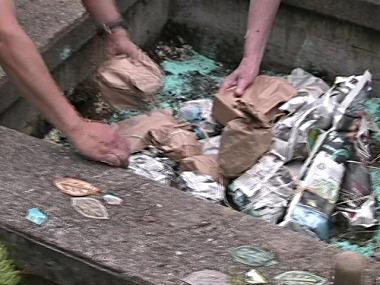
After the pit bed was prepared, we put the packed pots in (figure 4). In contrast to my Thanksgiving firing in the BBQs, the packed pots here were all wrapped in either a single sheet of newspaper or placed in a paper sack. Their purpose is to keep the packing materials for each pot as close to the pot for as long as possible. Why just a single sheet? Well, the idea is that when the flame gets to the pot, it will burn through the paper quickly and then burn the packing materials to make them fume. If the paper were thicker, then it might not burn and could instead act as a mask or saggar, and retard the fuming of the packing materials inside. I have some pots from a previous firing where the damp, multi-layer paper I used to wrap them remained intact at the end of the firing, resulting in more muted, smoky colors on the pots inside. Since here we were going for strong colors, single sheet would be a better idea.
By the way, Marc Lancet recommends using bailing wire to hold the packing materials close to the pot, but I’ve found ordinary twine to be sufficient, since I usually have just a single layer of pots in the pit, and they tend to be well nestled in place, along with their packing materials; but it’s definitely something you should consider if you have a pit with multiple layers of pots, or if your pots are not nestled firmly in the bed of sawdust or dung.
Here we had pretty much just one layer, with the exception of maybe one or two small pots that were resting on some larger pots (figure 4). On top of the layer of packed pots we added the following:
- more copper carb — just sprinkled here and there, 1/2 cup or so.
- baking soda — ditto.
- table salt — a couple tablespoons’ worth
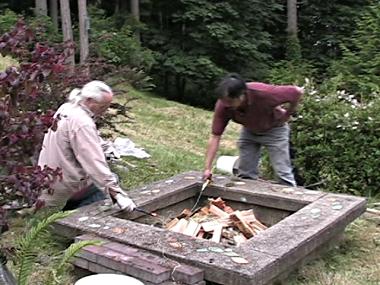
Above the layer of pots is the layer of fuel. We started with one layer of crumpled newspaper, on top of which we sprinkled a handful of fire starter chips — basically wood shavings soaked in starter fluid. Then we added a loose web of dry kindling wood strips, and on top of which some split seasoned fire wood. At 11:40 am we lit the pit and started the firing (figure 5).
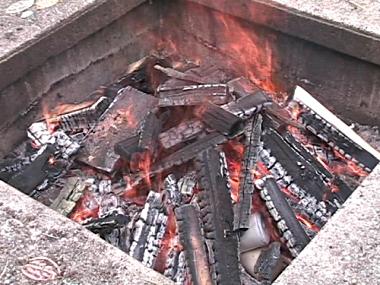
As it was a dry, warm, and windless day, the fire started burning vigorously almost right away (figure 6). Of course, the firewood being of the store bought, dry and seasoned type also helped. I generally prefer using seasoned firewood rather than wooden pallets or wood strips scavenged from woodworking shops, not only because the latter are banned in some places where I go firing, but also because they sometimes burn poorly and make you spend way too much time struggling with the fire. Since a hot, continuous fire is crucial for getting good fuming colors, I figured it was worth a few bucks to ensure we don’t get short changed on that front.
By the way, if you should decide to burn salvaged wood, make sure they are real wood — don’t burn plywood, treated wood, composite boards, etc., which burn poorly and are often illegal to burn because they emit toxic fumes. (And check you source of sawdust, too.)
Anyway, we kept on feeding the fire and had it burning vigorously (figure 6) until around 1:20 pm, when we fed the last log to the fire and started to let it burn down. In this span of just under 2 hours, we had burned up the equivalent of about 6 to 7 hardware store bundles of firewood. That was quite a lot for such short amount of time.
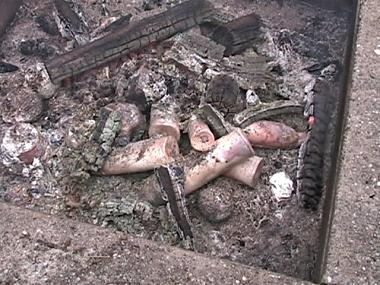
After the last log was put in, a decision needed to be made. Should we cover the pit with a piece of sheet metal to create a reduction atmosphere, or should we just leave the fire alone and let it burn down in the open? The reduction atmosphere is supposed to help getting more colors onto the pots; covering up the pit would also slow down the cooling and help reduce cracking and breakage. It does run the risk of creating a smoky environment that tends to darken the pots, however. After considering the pros and cons, we took a vote at 1:45 pm and decided — unanimously — to not covering up the pit (figure 7).
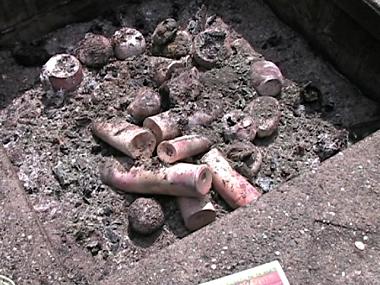
By 3:00 pm almost all pots had become exposed (figure 8), and we could see that most of them had picked up strong colors (red, orange, etc.) from the fuming of the packing materials. People became impatient and started to pick up their pots with gloved hands, to get a better look on the typically more dramatic underside (figure 1, 10, 11). Then at 3:38 pm the first pot was removed from the pit, and by 5:00 pm not only had all remaining pieces been removed, but most participants had left the site with their pots as well.
So there you have it, a pit firing event that runs from 10:00 am to 5:00 pm, with total firing time being well under 6 hours. Below is the timeline:
- 10:00 am: started packing the pots
- 11:20 am: started stacking pots in the pit
- 11:40 am: lit the fire
- 1:20 pm: stopped feeding the fire
- 3:38 pm: started to remove pots from pit
- 5:00 pm: all pots were removed and the fire doused
Note: the time spent on packing the pots was like a mini workshop session, because most participants in this firing were first timers. Experienced pit fire participants usually come to the firing with their pots already packed with their own packing materials, so the pit can be loaded right away.
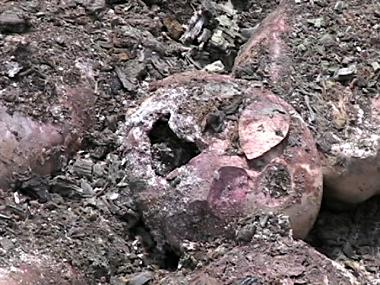
Now there were a few surprises in this firing. The first concerns the only breakage in this pit. Of course, breakage is nothing new for pit firing — most the pit fires I’ve been to the breakage rate is around 30%. But these usually involve cracks of various sorts, usually quite minor. What we have here, however, is a mini-explosion (figure 9) that popped off a whole section and left a gaping hole on the side of the pot — which is something I had never seen before. I scratched my head for a long time on this one, then I read Marc Lancet‘s caution against over-saturating pots with coloring washes immediately before the firing, and thought we might have found a possible cause for our problem — i.e. this particular pot, having been bisque fired to only cone 012 and thus more porous than the others, might have soaked up too much water from the seaweed or other wet materials packed around it, which later would turn into steam when the pot was heated. This steam could then cause an explosion if there was any structural weakness in the pot, e.g. uneven thickness that often occurs in some pinched pots. I don’t know whether the wet seaweed was the culprit in this case, but I’d in any case definitely be more careful with wet seaweed and other wet materials next time. (The lesson: dry them first before you use them.)
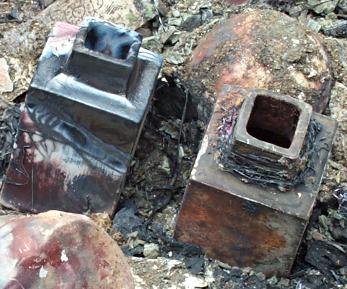
So that was the bad surprise. Now the good ones. First, I used to think cone 04 is too high a bisque temperature for taking on colors in a pit fire. But these two handsome counter-examples (with terra sig applied, bisqued to cone 04) by Steve Johnson (figure 10) show that that was not true at all. Furthermore, a couple shards that had originally come from a partially glazed cone 6 pot, which I was using in this pit to protect a vulnerable long-necked pot, picked up the maroon red of copper carb themselves, too. That’s right, vitrified, cone-6 surface picking up the fuming. Imagine that!
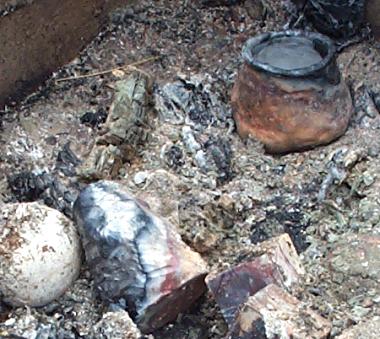
Another surprise is that terra sig applied over bisqueware (cone 06 in this case) right before the pit fire — i.e. without a re-bisque to fix the terra sig to the pot — also seems to have worked quite well (figure 11). In my previous firings such terra sig application would tend to pick up only black and just a little really, really dark red. But here we seem to have gotten a pretty decent range of colors, just as the other pots had.
So, in conclusion, I thought this was a very successful firing as an introduction for first timers. But how about my own pieces? Well, I had used this opportunity to perform a few experiments of my own, and got some exciting results — which I’ll write about in my next post. So, stay tuned and thanks for reading!