Steel Wool as Fuming Material

July 31st, 2006

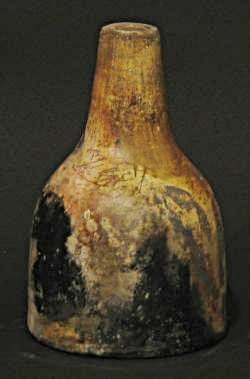
One of the experiments I performed at the Vashon Island pit fire last month involved the use of steel wool as a fuming material. I was curious about steel wool because I had thought it was the cause for the beautiful colors on a very nice piece from my first pit firing back in 2002.

img_0150b

figure 1: beautiful effects of steel wool fuming

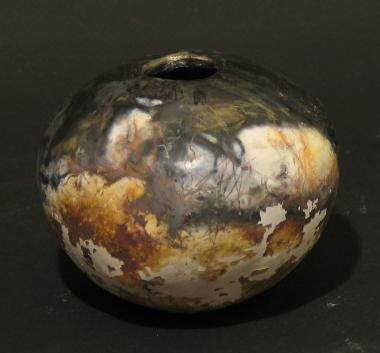
Well, I am still not sure — now that the experiment has been performed — if steel wool was behind the colors on that earlier piece, but as you can see in figure 1 above, the fuming of steel wool can certainly generate some truly wonderful color patterns on a receptive (i.e. terra sig coated and highly burnished) surface.

Read the rest of this entry »

Something Different — a Soda Fired Piece

July 17th, 2006

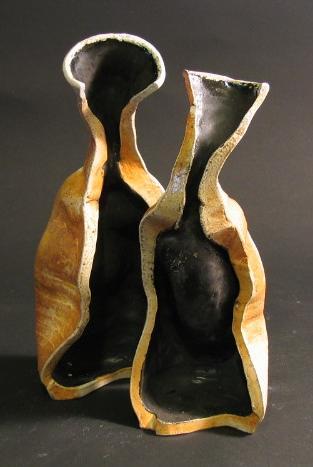
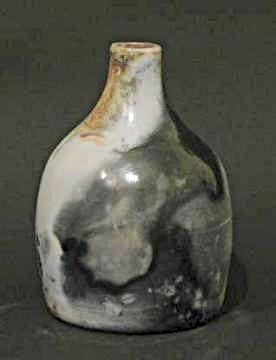
It turns out I don’t just make pit fired pottery. Here is a recent soda-fired piece — hmm… maybe you’d want to see this as two separate pieces, but they actually were two halves of the same piece originally…

img_0192xa

The piece stands about 8 inches tall, was thrown on the wheel in two separate sections (neck and body), joined and deformed while both still wet, and sliced into two halves at the early leather hard stage. Black liner glaze on the inside, high alumina orange flashing slip on the outside. It was soda fired (~ cone 6) in the new soda kiln at Pottery Northwest where I was — and still am — taking a class in soda firing.

Oh yeah, here is a video of the soda spraying process. Don’t be alarmed — it’s not as dangerous as it looks…

“Chore Boy” Effects Reproduced!

July 9th, 2006

I wrote a while back that, for my first pit firing, I got some very nice fuming effects from a disemboweled Chore Boy type copper scrubber; but I was unable to reproduce the same effects ever since. Well, at the most recent firing I finally managed to get similar colors (and then some) with the same setup — and so here is the report…

img_0170a

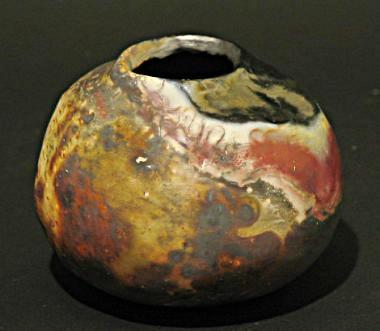
figure 1: did the red come from Chore Boy only?

I had seven pieces in this firing, two of which were intended as Chore Boy experiments. The first is a small pinched pot (figure 1 above) with two layers of packing materials, both very tightly wrapped around the pot:

  • Chore Boy-type copper netting (one single layer)
  • salted raffia (thin layer)

The feathery, wiggly lines in the deep red area apparently came from the copper netting that had started to disintegrate in that area. What’s unclear, however, is whether the larger, solid, and brighter red area to the right also came from the same. Or maybe it came from the admittedly plentiful copper carb in the pit instead?

Read the rest of this entry »

Island Pit Fire Party

June 29th, 2006

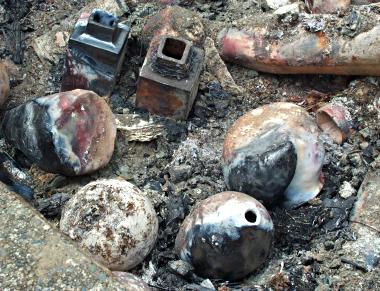
A couple weeks ago I was invited to lead a pit firing at Lin Holley‘s place on Vashon Island near Seattle. It was the first time I was put in charge of a pit fire with a group of experienced potters who nevertheless were pit fire newbies, and I worried beforehand that the firing would not turn out well enough, the pots would not pick up colors, and the participants would be so disappointed that they would never pit fire again. So I studied my notes and videos from previous firings carefully, and came up with a relatively conservative firing strategy that I hoped would maximize the chances for getting strong colors onto the pots. Luckily for me and for the others as well, the strategy worked, and everybody seemed very happy with the results (figure 1).
ldcp_1546w

figure 1: most pots got some colors!

N.B. if you have done pit firing, or if you have read my post on a previous firing, you’d know that the colorful pots in figure 1 above had already been handled before the picture was taken. The telltale sign is the jet black area on each pot — these should be on the side that’s still buried in the embers and thus invisible to us at this point.

All in all, I was very happy with this firing, and I thought it had served its main purpose well, i.e. as an introductory firing for first timers. It was done quickly, less than 6 hours from lighting the fire to taking the last pot out; it generated very little smoke; it resulted in just one broken pot and one slightly damaged one out of a total of 20 or so; and it got strong, dramatic colors on most pots. Below I’ll document the timeline and the process of this firing, so I’d know how to repeat it the next time, and hopefully you can use this as a reference for your own firing as well.

Read the rest of this entry »
Terra Sigillata Peel-Off & Flake-Off

June 21st, 2006

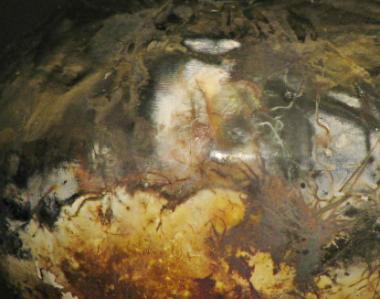
I have often had problems with flaking and peeling terra sig ever since I started pit firing. But since it doesn’t happen every time, I procrastinated in tracking down the root cause of the problem. Well, last Sunday I had a very successful firing — except for this flaking, peeling problem that happened to just about every pot I had in the pit, including some otherwise really gorgeous ones. Ouch!

img_0145a

Didn’t I say once that I learn more from my failures? So this time I fired up Google searching for “terra sig peel”, and found a bunch of great links on the Web:

So what was my problem? Apparently I over-burnished my pots before I applied the terra sig, resulting in a poor bonding between the terra sig and the pot surface. And why did I sometimes get away with it, and sometimes not? My guess is that the degree of thermal stress and the presence of various chemicals played a role too.

I’ve noticed the peeling and flaking usually happens on the up side, i.e the side of the pot that was exposed to the flames, and not on the side buried in the sawdust or dung; it also tends to happen more frequently where there was a lot of fuming, often as a result of direct contact with salts or metal. The “quiet” side is generally quiet with terra sig peeling as well.

Anyway, time to start thinking about a new burnishing strategy…

Beginner’s Luck — My First Pit Fired Pots (4)

June 14th, 2006

Now here (figure 1) is an even more ancient looking pot than the last one. Again, the clay body and the bisque temperature (white porcelaneous stoneware, cone 06) are the same as the other pots in this firing. What’s different here is the colorant used in the terra sigillata. In this case, a white terra sig with manganese dioxide mixed in was used to give an earthy brown tone to the piece. (This is what I think anyway — see below for an alternate explanation of where the brown might have come from instead.)

img_0092c

figure 1: real ancient looking pot

Read the rest of this entry »

Beginner’s Luck — My First Pit Fired Pots (3)

June 14th, 2006

In my last post I wrote about the use of cobalt carbonate to make a blue terra sigillata; here in the picture below (figure 1) is a different pot — but same white clay body and same cone 06 bisque — burnished with a pink terra sig, which was made from a white Tennesee ball clay base using red iron oxide as the colorant. As is in the case of the blue pots, the underlying pinkish red tint influences the final hues of the color flashes; here it gives the pot a warm but muted, almost aged look overall.

img_0043c

figure 1: pot with pink terra sig

Read the rest of this entry »

Beginner’s Luck — My First Pit Fired Pots (2)

June 13th, 2006

I wrote about trying — and failing miserably — to copy Dick Lehman‘s method for transferring carbonized images of plants onto pots in a previous post. Well, that pot was just one of the two on which I had attempted that trick. Here is the other one, which seems to have fared somewhat better — at least here we get a hint of the leaves (if they are indeed what I think they are) I had placed under a clay mask on the pot (figure 1). The clay mask is simply a big wad of moist clay fixed to the pot with newspaper and twine before the firing.

img_0052c

figure 1: image of leaves (I think)

Read the rest of this entry »

Beginner’s Luck — My First Pit Fired Pots (1)

June 11th, 2006

Some of my best pit fired pieces came from my very first pit fire in 2002. I had just taken a saggar firing workshop with Maria Spies, where I learned a few things about terra sigillata and packing materials for fuming colors onto pots — all saggar techniques directly transferrable to pit firing. Also, by this time my potter friends Dan Ebert and Gary Georger had already done two or three pit fires with various degrees of success. So one sunny Saturday morning in early September I joined them and a few others at the beach and had my first pit fire experience.

I’ll write about the firing itself next time; here I just want to show a few pictures of the firing results, along with some description about the packing materials and the kind of terra sigillata, if any, used for each pot.

img_0032c

figure 1: subtle hues from smoke and fumes

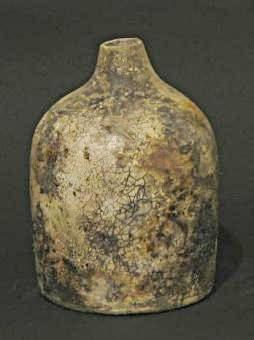
This bottle with a small neck (figure 1) stands about 6 1/2 inches (17 cm) tall. Clay body is a white porcelaneous cone 6 stoneware clay. A white terra sigillata with titanium dioxide added (about 2 teaspoons to one cup of liquid terra sig) was applied, burnished to produce a high sheen, and then bisqued to cone 06 before the pit fire. The titanium dioxide in the terra sig gave the pot a creamy white surface that seemed particularly receptive to subtle hues from the smoking and fuming that occurred in the pit during the firing.

Read the rest of this entry »
Mystery Pots

June 8th, 2006

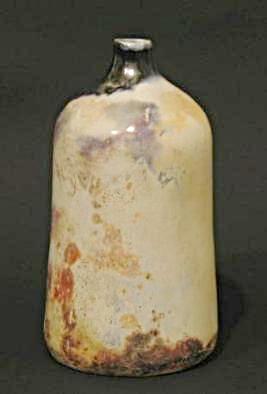
Sometimes it’s good to look at pieces without thinking about the technical details. So here are a couple pics for your amusement. I’ll write more about them later.

soda-03_1

Read the rest of this entry »